Quick Eats: Red Velvet Lava Cakes

Comments 3 Standard

RedVelvetLavaCakes01

Remember at the end of February when I said I intended on sharing a recipe for what I considered to be the greatest dessert ever? Well, here it is- unless you don’t like red velvet cake, of course- in which case please get far, far away from me. I will side-eye you into the next century.

A look at any of my birthday celebrations over the past few years is all the documentation anyone would ever need to see I love anything red velvet (and I only recently ran out of a limited edition red velvet-scented body wash that Bath & Body Works created a couple of months ago for the holiday season.) The only thing I may love more than the cake itself is miniature indulgent versions of it- or any dessert, really. I’m all about small- but satisfying- portions of cakes/pastries/sugary snacks. Less goes to waste and I’m less inclined to overeat/put myself into a food coma when I have a tinier serving on my plate.

When I first laid eyes on the recipe for these little, round and personal red velvet lava cakes- I knew I had to give them a try. How could I not?!
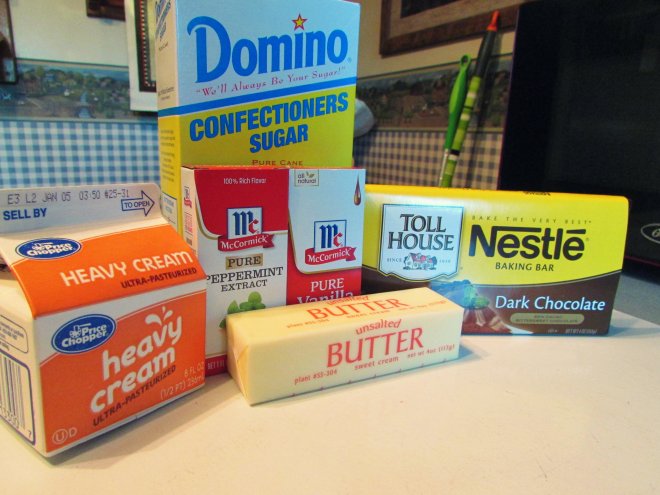
RedVelvetLavaCakes02

WHAT YOU’LL NEED:

* 3 tablespoons all-purpose flour

* 1 tablespoon cocoa powder

* Pinch of salt

* 4 tablespoons unsalted butter

* 1½ ounces semisweet chocolate

* ½ cup confectioners’ sugar, plus more for finishing

* 1 egg

* 1 egg yolk

* ½ teaspoon pure vanilla extract

* 2 teaspoons red food coloring

OKAY, HERE’S WHAT YOU DO:

1. Preheat your oven to 425°F. Lightly grease two ramekins (or two cavities of a muffin pan) with nonstick spray.

2. In a small bowl, whisk the flour with the cocoa powder and pinch of salt to combine.

3. In a medium-sized, heat-safe bowl, melt the butter and chocolate in 15-second intervals in the microwave until melted and smooth.

RedVelvetLavaCakes03

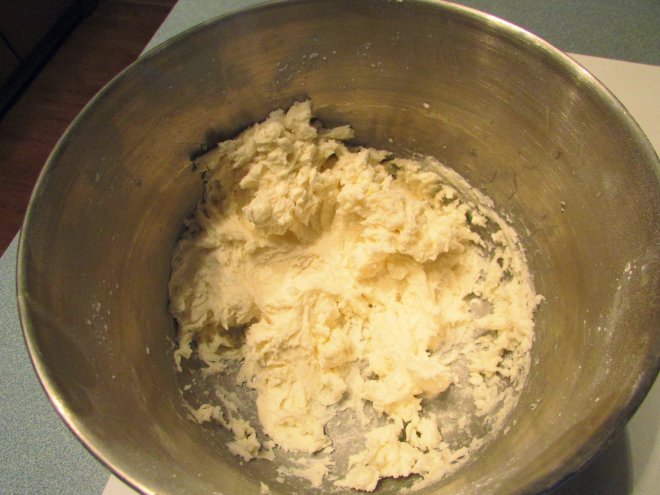
4. Stir in the confectioners’ sugar into the butter and melted chocolate mixture until well combined. From there- add the egg, egg yolk, vanilla extract and food coloring- and stir until well combined.

5. Add your now red-tinted concoction to the whisked flour, cocoa powder and salt. Mix thoroughly until there are no lumps.

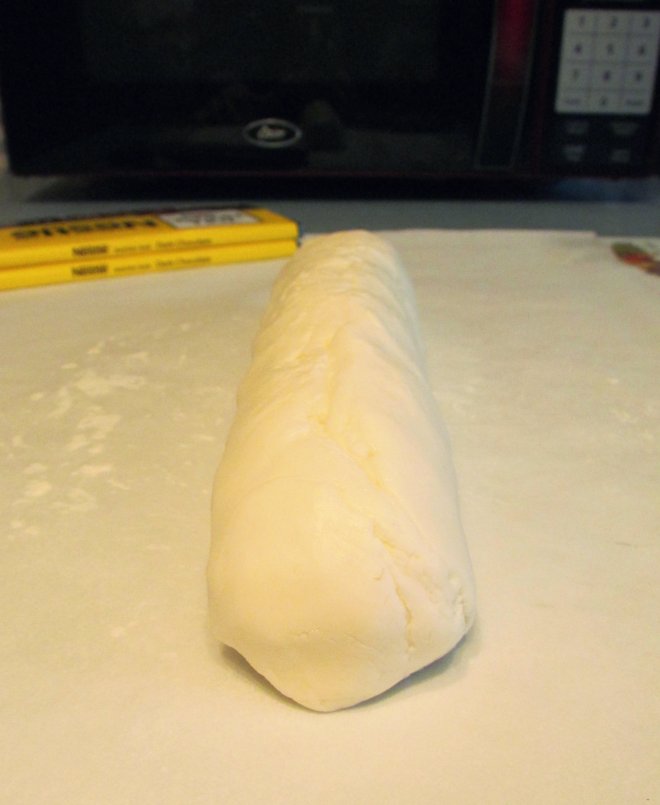
6. Divide the batter evenly between the prepared ramekins. Bake until set at the edges but still soft in the center, approximately 13 to 15 minutes. Let cool for 3 to 5 minutes inside the pan, then un-mold each cake onto a plate.

RedVelvetLavaCakes04

7. Serve warm- immediately- and garnish with confectioners’ sugar.

8. Don’t burn the roof of your mouth as you inhale your serving of molten deliciousness!

RedVelvetLavaCakes05

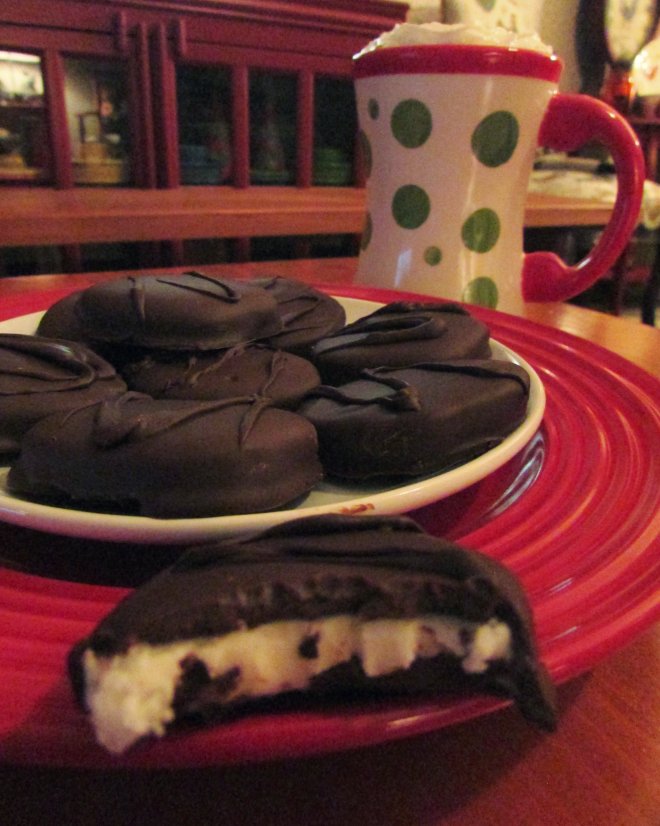
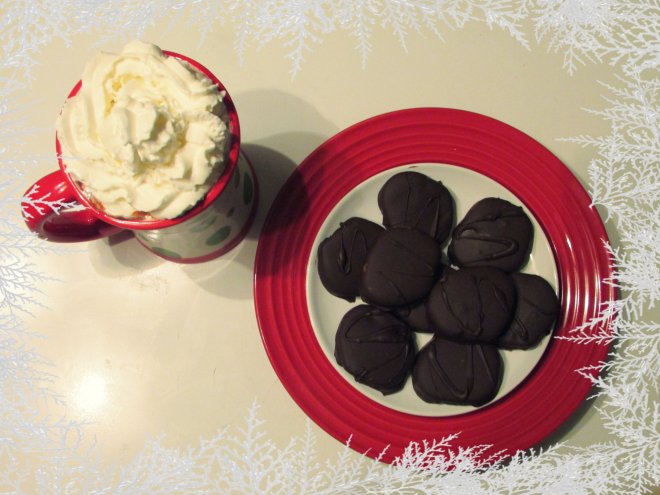
These little cakes came out so much better than I could have ever anticipated- and the inside was cooked to gooey, warm and sweet perfection. I served these prior to Sunday night’s sit-down for the latest ‘Walking Dead’ episode and they were a big hit!

I can imagine that if you substitute a few of the ingredients, you could probably make all sorts of flavor variations of these cakes with minimal effort or disaster. I’m tempted to try my hand at a dark chocolate or more fruity/lemon version the next time!

… But not after I make a few more red velvet ones, first.

xx

Quick Eats: Baked Breakfast Cups

Comments 3 Standard

BreakfastCupsRecipe01

I’m fairly certain I’ve said it before- but I am a breakfast food fiend. It’s my favorite meal of the day and the meal I could eat any time of day, really. With that being repeated, I’m always looking for new and delicious ways to kick-start my morning so that I’m left feeling full but not bored with the same old routine (I can’t eat the same thing every single day- even if I love it!) so when I first saw this recipe for “Breakfast Cups”, using hash browns as a sort of bowl to hold the ingredients together- I knew I had to give it a try. Worst case scenario if the cups didn’t come out as planned was that I’d have a very funny shaped omelette- but I’m a firm believer that there’s no such thing as a bad omelette.

Having recently and unexpectedly been snowed in (I did NOT anticipate the storm that hit us last week to be as bad as it was!) my mother was kind enough to lend me some of the ingredients for this concoction until I can drag myself to the market- as well as her mother (my grandmother’s) antique muffin pan- which looks rusted, I know- but I SWEAR it’s just discolored from years and years (50+!) of use. It’s completely clean and sanitary for anyone looking at the photos in this post and recoiling in horror.

Give me a little credit, please!

BreakfastCupsRecipe02

WHAT YOU’LL NEED:

  • 12 breakfast sausages
  • 6 eggs, lightly beaten
  • 2 cups (8 ounces) of shredded 4-cheese Mexican blend cheese (or any cheese you prefer!)
  • 1/4 cup chopped red bell pepper
  • 3 cups of frozen country-style hash brown potatoes, thawed
  • 3 tablespoons of melted butter
  • 1/8 teaspoon of salt
  • 1/8 teaspoon of pepper
  • 1/4 cup chopped fresh chives or green onion

OKAY, HERE’S WHAT YOU DO:

1. Pre-heat your oven to 400°F.

2. Prepare the breakfast sausages according to the package instructions, cool slightly, and cut into 1/2-inch pieces. Set the sliced sausage aside.

BreakfastCupsRecipe03

3. Combine/whisk the eggs, cheese, and pepper in a bowl- and set that aside as well.

4. In a separate bowl, combine the hash browns, butter, salt and pepper. Divide evenly into 12 greased muffin cups.

5. Press the mixture into the bottom and sides of the muffin cups to create a bowl-like shape to hold your egg/cheese mixture and sausage.

BreakfastCupsRecipe04

6. Cook the hash brown bowls for approximately 15 minutes or until lightly browned.

7. Once you remove the muffin pan from the oven- divide sausage pieces into the hash brown bowls. Top each bowl evenly with the egg/cheese mixture. Sprinkle each bowl with chives and onion.

BreakfastCupsRecipe05

8. Return your muffin pan to the oven and bake another 12-15 minutes or until set.

9. Serve and enjoy!

BreakfastCupsRecipe06

I was really pleased with how well these little cups turned out- and even more pleased with how good they tasted. They were the perfect combination of saltiness, crisp-ness and cheesy-ness- and were very, very filling. I managed to scarf down two before I felt stuffed- and I also felt inspired to re-create these for my next brunch gathering (I do love a good brunch, too!)

One word of advice, though- just make sure you grease the muffin pan properly! A couple of my cups got a little stuck around the edges, which made for a not-so-clean removal when it came time to serve these. Other than that- these are incredibly simple to make an I urge anyone who may be finding themselves in a dreaded “breakfast boredom rut” to give them a try!

xx

BreakfastCupsRecipe07

Quick Eats: Carnival Casserole

Leave a comment Standard

CarnivalCasserole01

While most of the ‘Quick Eats’ posts I’ve shared on here have been inspired by recipes I’ve discovered all on my own (gotta’ love late night internet browsing), I do have a few concoctions up my sleeve that have actually been passed down to me from family members, great-grandparents, and so on. ‘Carnival Casserole’ is one of those dishes- and don’t let the name fool you- it doesn’t taste nearly as crazy as it sounds.

My grandmother (on my dad’s side) used to cook this up for my brothers and I when we were kids and would stay over her house for the weekend. It was quick to prepare, tasted good, and was filling- which meant we were less likely to go rummaging through her cupboards for a late-night snack after our designated bedtimes came and went.

Since then, my mom occasionally makes this dish- typically when she’s expecting a lot of people for dinner- but has shared the recipe with me to keep the history (and tradition) of this casserole alive and well- although even she couldn’t tell me why it’s called ‘Carnival Casserole’ in the first place.

CarnivalCasserole02

CarnivalCasserole03

WHAT YOU’LL NEED:

* 1/4 cup of chopped onion

* 1/4 cup of chopped green pepper

* 1 lb. ground beef

* 1 lb-12 oz. can of diced tomato

* 1/2 cup of corn cyrup

* 1/2 teaspoon of salt

* 1/4 teaspoon of pepper

* 2 tablespoons of cornstarch

* 1 box of macaroni

* A handful of shredded cheese (your preference on the type!)

CarnivalCasserole04

OKAY, HERE’S WHAT YOU DO:

1. Preheat your oven to 350ºF

2. In a large pan, sauté the chopped onions and peppers until they’re tender. Add the ground beef and mix until it is browned and thoroughly cooked through.

3. With the exception of 1/4 cup (which you’re going to use momentarily)– drain the liquid from the can of diced tomatoes. Add them, the salt, pepper and corn syrup to your pan and bring everything to a boil- then let it simmer for about 10-15 minutes.

4. While your vegetables and ground beef are simmering, take the opportunity to boil, cook and strain your macaroni.  Using a casserole dish, pour the pasta in- creating an even layer of macaroni along the bottom of the dish. Return to your beef and vegetable mix.

CarnivalCasserole05

CarnivalCasserole06

5. In a separate bowl, combine the saved 1/4 cup of juice/liquid from the can of diced tomatoes with the 2 tablespoons of cornstarch. Mix until the consistency is smooth and then add it to your pan of beef and vegetables. Stir until the texture of your mixture is a bit thicker.

6. Pour the beef/vegetable mix on top of the cooked pasta in the casserole dish. You’re going to mix everything together one last time to make sure the macaroni is evenly coated in the sauce before you sprinkle your handful of shredded cheese on top (feel free to add more if desired.)

CarnivalCasserole07

7. Bake for 30 minutes.

8. Once the casserole is done baking, let cool for 5-10 minutes (it’s gonna’ be really hot otherwise!) and then serve!

CarnivalCasserole08

This casserole has a variety of flavors in it and all of them are good- and to prepare and bake everything takes just under an hour- making this a perfect go-to dinner when you’re in a pinch for time but want to serve something that tastes delicious and hits the spot.

If and when I have kids of my own, I plan on passing along this recipe to them, too. It’s pretty fun and more than a little neat to have something as simple as this this carry on for generations and generations!

xx

CarnivalCasserole09

Quick Eats: Homemade Peppermint Patties

Comment 1 Standard

PeppermintPatties01

Since I’m not scheduled to start my new job for a couple more weeks, I’ve had plenty of time to get into a more festive state of mind in preparation for the upcoming holidays. My Christmas tree is going up this coming weekend (as well as an attempt at some exterior illumination ala Clark Griswold in ‘Christmas Vacation’,) I’ve been listening to classic holiday music in my car as I go from store to store to try and finish my shopping and gift wrapping within a reasonable amount of time- and I’ve been looking at seasonal recipes in-between signing Christmas cards and drafting my usual year-end best wishes e-mails to distant friends and former colleagues.

Over this past weekend, one recipe in particular caught my eye- homemade peppermint patties. Growing up, my dad ate the individually wrapped York brand of the candies all the time, and nearly every Christmas present I purchased for him up until his passing included an oversized bag of them with it, too.

And so I thought it’d be fun to try my hand at making my own this year, instead.

PeppermintPatties02

WHAT YOU’LL NEED:

* 3 cups confectioners’ sugar

* 3 tablespoons unsalted butter, at room temperature

* 3 tablespoons heavy cream

* 1¼ teaspoon peppermint extract

* ½ teaspoon vanilla extract

* 12 ounces dark chocolate candy melts or baking bars

OKAY, HERE’S WHAT YOU DO:

1. In the bowl of an electric mixer fitted with the paddle attachment, mix the confectioners’ sugar and butter to combine. Add the cream gradually, and mix until the mixture is uniform.

2. Add the peppermint and vanilla extracts, and continue mixing to combine.

PeppermintPatties03

PeppermintPatties04

3. Place the peppermint mixture on a piece of parchment paper and form it into a log about 2 inches in circumference.

4. Wrap the log in the parchment and transfer to the freezer. Freeze until well chilled (approximately 20 to 30 minutes.)

5. Using a sharp knife, cut the frozen log into ½-inch-thick wafers. If the mixture seems to have softened, return the wafers to the freezer.

PeppermintPatties05

PeppermintPatties06

6. Melt the chocolate in the microwave in 15-second intervals, mixing in between. Line a baking sheet with parchment paper. Working one at a time, dip each wafer into the melted chocolate with a fork. Tap away excess chocolate from the base, then transfer each dipped piece to the prepared baking sheet. Let set fully.

PeppermintPatties07

7. Once the chocolate has set, use a spoon to drizzle more melted chocolate over the peppermint patties in a decorative fashion. Let set fully before serving. Store in an airtight container for up to a week.

These things came out SO GOOD. Sure, they weren’t perfectly round like the York brand, and sure- I deliberately cut them a teeny, tiny bit thicker than instructed- but they tasted incredible.

And if eating a tray of these things wasn’t enough to ruin my diet for a week and a half- I also served the Patties up with a hot mug of Nutella cocoa, which is made by simply adding two tablespoons of Nutella to one cup of steamed milk and stirring until it’s evenly dissolved.

I plan on making another batch of these for when I have family over on Christmas Eve- and I’d like to think my dad would have enjoyed them, too!

PeppermintPatties08

Quick Eats: Sweet Potato Waffle Fries

Leave a comment Standard

SweetPotatoWaffleFries01

Happy Early Thanksgiving, fellow American friends and followers! Now, whatever your thoughts or opinions are on the origins of this holiday- I think it’s safe to assume we can all agree that eating a ton of great food is the best, right? Of course it is!

And naturally, there’s almost always leftovers (especially when my mom hosts Thanksgiving- since she tends to make way too much food every. single. time. without fail,) and while the initial meal is undoubtedly fantastic- by day three or four of eating reheated turkey and vegetables- dinner can seem a bit stale and boring.

Thankfully, this year I came prepared- having scoured the web for interesting, innovative and tasty ways to liven up leftovers a little bit- and I thought I’d share one of my favorite finds: a quick and simple way to revive those extra sweet potatoes you may have laying around post-Turkey Day. My favorite thing about this recipe- apart from how delicious these fries were when they’d finished cooking- was that they can be served any time of day. They work well as hash browns with breakfast, or as a crunchy and salty side to the main course at dinner.

SweetPotatoWaffleFries02

WHAT YOU’LL NEED:

* 2 medium sweet potatoes, peeled

* 1 medium russet potato, peeled

* 3 tablespoons butter, melted

* A pinch or two of salt and freshly ground black pepper

OKAY, HERE’S WHAT YOU DO:

1. Plug in and preheat your waffle iron. Spray the interior with nonstick spray.

SweetPotatoWaffleFries03

2. Use a grater to grate the potatoes. In a large bowl, toss the potatoes to combine. Add the butter and combine that as well. Season the mixture with salt and pepper.

3. Divide the mixture into even portions. Mound a portion onto the heated waffle iron and then spread it out toward the edge of the iron to form a thin and even layer. Close the waffle iron and cook on high heat for 4 to 5 minutes, or until the potatoes are golden and crisp.

SweetPotatoWaffleFries04

4. Repeat with the remaining potato mixture portions. Serve immediately.

5. Shovel shamelessly into your mouth and enjoy!

SweetPotatoWaffleFries05

I love sweet potatoes to begin with, so I’m glad to have another way to prepare them to add to the list. These really are so good.

I’m wishing you all a safe and happy holiday filled with family, friends, and never-ending baskets of warm crescent rolls. I have a lot to be thankful for this year- and I look forward to expressing my gratitude to my loved ones who are gathering at my mother’s house tomorrow afternoon.

‘Til next time,

xo

Quick Eats: Feta and Caramelized Onion Puffs

Comments 4 Standard

FetaAndOnionPastries01

So if you’re like me, you’re probably looking for a way out of the sugar high/sugar crash downward spiral otherwise known as the days following Halloween- where any and all extra candy that wasn’t deposited into the Trick-Or-Treat bags of costumed little kids (and some not costumed and just plain sneaky adults) is being devoured by you and anyone you live with during random intervals throughout the day. Who knew Kit Kat bars were such a delicious addition to breakfast? (I knew, but that’s besides the point.)

Once you’re ready to put down the miniature Milky Ways and Snickers and begin eating real food again- I have a quick, simple and tasty transition to help you ease your way back from chocolate-induced coma to a much more satisfying and slightly saltier appetizer.

FetaAndOnionPastries02

FetaAndOnionPastries03

WHAT YOU’LL NEED:

* 1 package of miniature fillo shells (you can find pre-packaged shells or the dough to make your own in the frozen baked goods aisle at your local grocery store!)

* Feta cheese

* 1 thinly-sliced Vidalia onion

* 1 teaspoon of caramelized onion sauce

* 1 tablespoon of salted butter

OKAY, HERE’S WHAT YOU DO:

1, Preheat your oven to 350°

2. Using a baking pan or muffin pan, line up the fillo shells. Be sure to keep a little bit of space between the shells so that they aren’t touching and can bake evenly.

FetaAndOnionPastries04

3. Using a saute pan or frying pan, melt the tablespoon of butter and saute the onions until they are a golden brown.

4. Using a regular bowl, mix the sauteed onion slices with the teaspoon of caramelized onion sauce. Make sure the slices are evenly covered and coated.

FetaAndOnionPastries05

5. Fill the fillo shells with the feta cheese, and top with the coated sauteed onion slices.

6. Bake the shells and toppings in the oven for 8-10 minutes or until the outer edges of the shells appear to be slightly darker and crisp.

7. Let the baked puffs cool for 1-2 minutes, and then try to stop yourself from cramming all of them in your mouth at once.

FetaAndOnionPastries06

It was seriously love at first bite with these things, and I can’t get over how easy and quick it was to prepare them. They’re salty, crunchy, and satisfying- and the recipe will definitely come in handy the next time you’re in a pinch for time and need to make something mouthwatering to serve guests (or to just serve yourself!)

I think I’ll be breaking out this recipe again for Thanksgiving!

Quick Eats: Yogurt Biscuits with Honey Butter.

Leave a comment Standard

YogurtBiscuits01

When preparing a large home-cooked meal- like my specialty of roasted chicken and vegetables, for example- it just doesn’t feel right not having fresh, warm biscuits at the table, too. Unfortunately, if you love them as much as I do- then you’ll know that eating them in mass quantities (which I have done- not my proudest moment,) isn’t the best thing for you. Of course, these days it’s easier to find considerably healthier substitutes for beloved recipes that don’t skimp on flavor- and I came across this yogurt-infused version of classic biscuits and had to give it a try.

YogurtBiscuits02

WHAT YOU’LL NEED:

* 3 cups all-purpose flour

* 4 teaspoons baking powder

* 2 teaspoons kosher salt

* 1 1/4 cups Greek yogurt

* 1/3 cup buttermilk

* 2 tablespoons butter, melted

* 1/4 cup honey

OKAY, HERE’S WHAT YOU DO:

1. Preheat the oven to 400°F. Line a baking sheet with parchment paper.

2. In a medium bowl, whisk the flour with the baking powder and salt to combine. In a small bowl, whisk the yogurt with the buttermilk to combine.

YogurtBiscuits03

3. Make a well in the center of the flour and add the yogurt mixture to it. Using a large spoon, mix to combine. The dough will look crumbly- but it will actually be fully moistened. If you’re unsure of the consistency, it’s okay to add a little more yogurt. (I did this and they came out just fine!)

4. Scoop the dough into 12 even balls and place them side by side, touching each other, in four rows of three.

YogurtBiscuits04

5. In a small bowl, whisk the butter with the honey to combine. Brush half the mixture over the biscuits and save the rest for when the biscuits are finished baking.

6. Bake the biscuits until golden brown, 25 to 30 minutes. Remove the biscuits from the oven and brush with the remaining honey butter. The biscuits are best served warm, but can be made up to a day ahead.

YogurtBiscuits05

The biscuits were sweet, fluffy on the inside, and had just the smallest hint of tangy-ness to them from the yogurt- but they were delicious! While I had made these to accompany a dinner I had cooked- I think I’d like to try these as breakfast biscuits in the future. The honey butter makes them a great way to begin a morning!

xx

Quick Eats: Herb-Crusted Pork Cutlets.

Leave a comment Standard

HerbCrustedPorkCutlets01

I’ve never really been one to eat a lot of pork. I’m not picky by any means, but when it comes to cooking- I usually stick to what I know and what I can’t do wrong with (so chicken and fish, basically.) On the occasions when I do eat pork, and specifically pork chops/cutlets- they’re usually as plain as possible. It doesn’t make them bad- just a little bland- and nothing about them has ever really stood out or caused me to crave them the way I would other foods on the dinner menu.

During my most recent trip to the local market, I picked up a couple of pork cutlets that were on sale in the hopes of finding a recipe that would give them a little boost of flavor when it came time to prepare a meal with them. After a little browsing, I found this herb-crusted cutlet guide that looked really tasty- and I decided to give it a try!

The recipe below is in preparation of six cutlets. I only cooked up two- so the ingredients can be changed around a little to better accommodate you and how many of these you’re looking to make. I used just enough flour, egg, and bread crumbs/herb/cheese mixture to evenly coat the cutlets as to not waste anything.

HerbCrustedPorkCutlets02

YOU WILL NEED:

* 6 sliced pork cutlets

* Salt and freshly ground black pepper

* 1 cup all-purpose flour

* 2 eggs, lightly beaten

* 2 cups bread crumbs

* 4 tablespoons chopped fresh herbs (such as thyme, rosemary, tarragon, sage or oregano)

* 3 tablespoons grated Parmesan cheese

* 1/4 cup olive oil

* Flaky sea salt, for finishing

OKAY, HERE’S WHAT YOU DO:

1. Season the pork cutlets with salt and pepper.

HerbCrustedPorkCutlets03

2. Prepare a breading station: Place three shallow bowls on your work surface. Fill the first with the all-purpose flour, the second with the beaten eggs and the third with the bread crumbs. Add the herbs and cheese to the bread crumbs and mix to combine.

3. Bread the cutlets: Dip a cutlet into the flour and shake off the excess. Next, dip it into the egg and let the excess drip off. Finally, press the cutlet into the bread crumbs to coat it on all sides, then set aside. Repeat with the remaining cutlets.

HerbCrustedPorkCutlets04

4. Cook the cutlets: In a large sauté pan, heat the olive oil over medium heat. Cook the cutlets until golden brown on each side, 3 to 5 minutes per side.

5. Remove the cutlets from the pan and finish with flaky salt. Serve warm.

HerbCrustedPorkCutlets05

I served these cutlets- which were tender and full of flavor thanks to the herbs and cheese- with warmed apple sauce for dipping, roasted red potatoes, and steamed broccoli. It was an incredible and filling meal that I’m looking forward to making again the next time I have company over!

I’d actually love to cook them tonight for The Patriots’ season opener against the Steelers- but such an occasion calls for chicken wings and nachos, instead.

xx

Quick Eats: Salted Peanut Butter Cup Smoothie

Leave a comment Standard

PeanutButterCupSmoothie01

I fully and openly admit that when it comes to Autumn-centric beverages, I much prefer salted caramel flavored anything over the immensely popular pumpkin spice flavored drink/food. There’s just something about the perfect mixture of sweet and salty that can satisfy nearly any craving.

Of course, it’s still technically Summer here- and with the temperatures still steadily soaring high- it might be a little bizarre to walk into any coffee shop to order a piping hot salted caramel latte or hot chocolate.

Thankfully, there’s a colder alternative available that takes no more than 2 minutes to prepare, mix and enjoy. Best of all, this recipe can easily be tweaked to become sweeter or saltier based on your own personal preference.

I went ahead and made it the old fashioned way, so the recipe below reflects what I used and how many measurements it’d take to make one smoothie.

PeanutButterCupSmoothie02

WHAT YOU’LL NEED:

* 1 cup vanilla almondmilk

* ½ frozen banana

* 1 tablespoon cocoa powder

* 1 tablespoon peanut butter (creamy- not chunky)

* ½ cup ice

* 1 scoop vanilla whey protein powder

* A pinch (or two) of sea salt

OKAY, HERE’S WHAT YOU DO:

1. Blend all ingredients (except the sea salt) until smooth.

2. To garnish, sprinkle the pinches of the salt on top. You can also use chocolate bar shavings and/or caramel sauce to make it look more presentable.

3. Enjoy!

How easy is that, right? I’ve been loving these lately- and they’re a great way to transition from Summer to Fall flavors without burning your tongue.

If you have any Summer-to-Fall recipes (including beverages) that you swear by this time of year- I’d love to hear them!

xx

Quick Eats: Buffalo Chicken Dip

Comment 1 Standard

SuperBowl20151

Wow. That’s really all I can say about Sunday night’s nail-biter between the New England Patriots and the Seattle Seahawks. Just wow. Despite living in Massachusetts, it’s well known among my circle of friends that I’m not the biggest Patriots fan (it has nothing to do with the team or the coaching staff- who I’ve grown to admire and respect throughout the years- but more with the often overwhelming, aggressive, and obnoxious behavior of some of their more vocal die-hard fans that all but ruin the fun for myself and others.)

Regardless, even though I had been low-key hoping the Seahawks would be victorious- I have to give credit where credit is due. The Pats played their hearts out and earned that win. I’m happy for them, and happy for their fans. I’d even go as far as showing my appreciation at the duck boat parade scheduled in the city for tomorrow morning, as is the tradition whenever one of our sports teams wins a championship- but with the recent blizzard 2.0 blanketing Boston shortly after the game came to an end and my having to be at work- it looks like I’ll have to live vicariously through my friends’ Instagram and Twitter photos. Have fun, everybody!

For the actual Super Bowl, my friend Stef had a bunch of us over her apartment to watch the game, eat some snacks, and have a couple of beers while we cheered and jeered touchdowns, interceptions, Katy Perry’s halftime show- and that really, really awful Nationwide commercial (seriously. What WAS that?) Not wanting to show up to the get together empty-handed, I put together a dish of one of my favorite, easiest, and quickest party recipes to make- buffalo chicken dip.

SuperBowl20152

YOU WILL NEED:

* Baking dish/pan

* 1 package (8 oz.) of cream cheese

* 10 oz. boneless white chicken (some people use chicken in a can, but that sounds a little gross to me- so I opted to purchase a pre-cooked rotisserie chicken from my local deli and carve that up instead. Whatever is left over can be used to make chicken salad, sandwiches, etc.!)

* 1/2 cup buffalo wing sauce

* 1/2 cup blue cheese (or ranch, depending on preference,) dressing

* 2 cups shredded Monterey Jack cheese

* Tortilla chips, crackers, or celery/carrot sticks to use for dipping

OKAY, HERE’S WHAT YOU DO:

1. Preheat your oven to 350°F.

2. Spread the package of cream cheese into your un-greased baking dish/pan.

3. Layer the boneless chicken, the 1/2 cup of buffalo wing sauce, and the 1/2 cup of blue cheese (or ranch) dressing on top of the spread cream cheese. Depending on what particular degree of flavor you’re looking for- you can add or deduct any of the ingredients to make the dip spicier or more mild.

SuperBowl20153

SuperBowl20154

4. Sprinkle the 2 cups of Monterey Jack cheese on top of everything.

5. Cook uncovered in the oven for 20-25 minutes or until the cheese on top is completely melted.

6. Let the dip cool for a 10-15 minutes. Serve with tortilla chips, crackers, or celery/carrot sticks.

7. Dig in and enjoy!

SuperBowl20155

SuperBowl20156

Overall I think the dip was a success (it was nearly gone by the time the game ended!) and it’s something that can be made again in no time at all before (or even during) the next party, too- be it sports-related or not!

SuperBowl20157

SuperBowl20158