Quick Eats: No-Bake Caramel Cheesecake Shooters

Leave a comment Standard

I spent most of this past Saturday, a drizzly and dreary morning and afternoon- with a pretty powerful migraine and jaw ache following a routine cleaning at my dentist’s office. Whether it was the sound of the scraping or the uncomfortable angle I was positioned in on the chair, I’m not sure- but not even Ibuprofen could help me and I dreaded the thought of chewing anything solid for a few hours.

By the time late afternoon rolled around- I was feeling a little better- but my sweet tooth had been triggered. Not wanting to risk hurting my still-sore jaw with anything too crunchy (which meant cookies were out of the question)– I decided to try whipping up something soft and decadent and pulled up a recipe I’d had saved on my phone for a while now.

I love cheesecake- any variation of it- although making it from scratch can be a bit taxing. Thankfully, this 20-minute recipe gives you all of the taste with a fraction of the prep-time and leaves little to no mess at all!

WHAT YOU’LL NEED:

  • Shooter glasses (I used 3 larger sized ones for this)
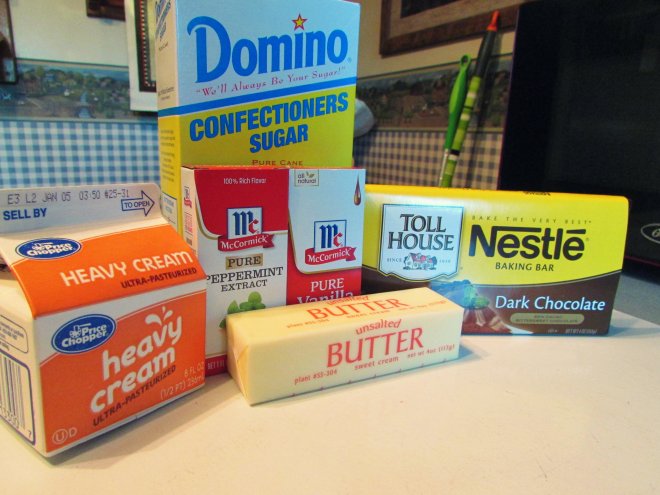
  • 4 tablespoons of butter
  • 8 ounces of cream cheese (1 package)
  • 1 can of condensed milk
  • 1 jar caramel sauce
  • 4.5 ounces of graham crackers
  • Whipped cream

OKAY, HERE’S WHAT YOU DO:

1. Crumble your graham crackers. I actually bought mine pre-crumbled (check your local store’s baking goods aisle to see if they have them!) but in case you can’t find any- it’s easy enough to just mash a whole bunch of graham crackers in a bowl.

2. Melt your butter in a separate bowl and then mix it with the crumbled graham crackers. Make sure all of your crumbs are coated with the butter.

3. Spoon a layer of the graham cracker crumb & butter mixture into the bottom of your shooter glasses. Be sure to try and get the top of the layer as flat as possible since you’re going to be adding more layers to this (and you’ll want to have plenty of room!)

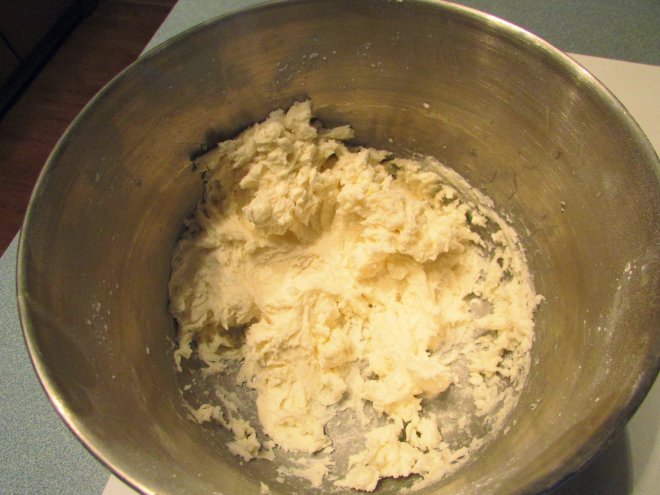
4. In a separate bowl, add the cream cheese and 2/3 of the can of condensed milk. Mix together well. Once you’re finished- spoon a layer of this mixture to your shooter glasses on top of your graham cracker layer.

5. Repeat one layer of the graham cracker/butter mixture in your shooter glasses, and then another layer of your cream cheese/condensed milk mixture.

6. Using a small bowl, combine your caramel sauce with the remaining condensed milk and mix well. Pour this mixture into your shooter glasses to top them off.

7. Refrigerate the glasses for 1 hour.

8. Top the shooters with whipped cream (and if you have any graham cracker crumbs remaining- throw those on too!) and serve!

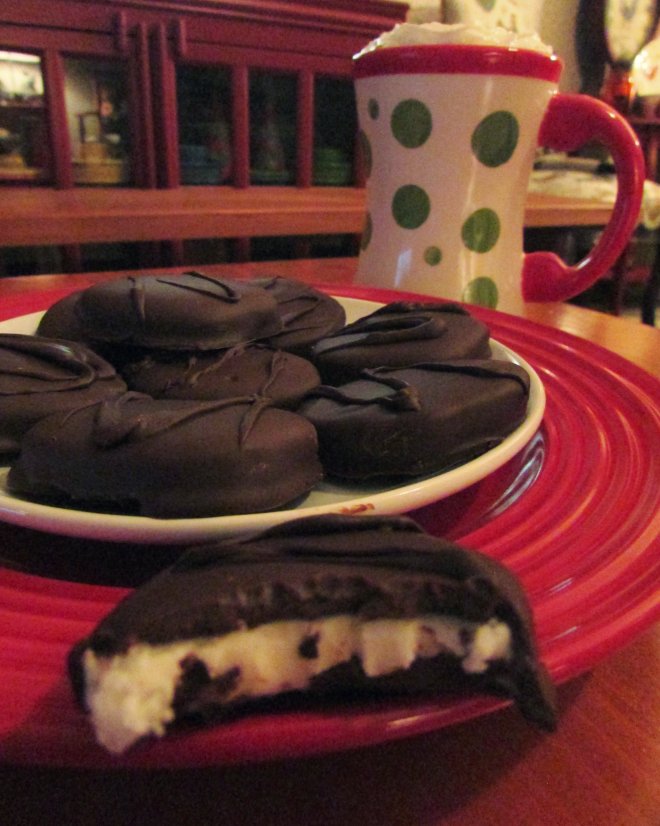
These came out really good. As soon as I dug into one with a spoon, all of the layers just combined perfectly and each bite had a little bit of everything- the caramel, the filling, and the graham cracker crust. So delicious!

I know I’ll be making these again the next time I have company over since they’re easy enough to prepare and would make a great party dessert when there’s a lot of people over. I may even add some chocolate to this recipe just to mix it up a little!

xx

Quick Eats: Snack-Safe Chocolate-Chip Cookie Dough

Leave a comment Standard

EdibleCookieDough01

Do you like the taste of raw cookie dough but dislike the danger of salmonella that comes with it whenever you sneak a spoonful while you’re baking? Then do I have good news for you! In what is probably one of the quickest, easiest recipes I’ve stumbled across (three steps and only a handful of ingredients? Yes please!)– I have found an egg-free, safe-to-snack-on, and absolutely delicious alternative to raw cookie dough that tastes EXACTLY like the real thing.

Maybe even better than the real thing, actually.

Don’t believe me? Here’s the recipe. Try it fr yourself and see what you think!

EdibleCookieDough02

WHAT YOU’LL NEED:

  • 1½ sticks butter, at room temperature
  • ⅔ cup granulated sugar
  • ⅔ cup light brown sugar
  • 1½ teaspoons pure vanilla extract
  • 2¾ cups almond flour
  • ¾ teaspoon salt
  • 2 cups chocolate chips

EdibleCookieDough03

OKAY, HERE’S WHAT YOU DO:

1. In the bowl of an electric mixer, cream the butter with the sugar and brown sugar until light and fluffy, 4 to 5 minutes. Add the vanilla extract and mix to combine.

2. Add the almond flour and salt; mix to combine. Add the chocolate chips and mix just until evenly incorporated.

3. The cookie dough can be served immediately or refrigerated in an airtight container until ready to serve (for up to a week).

That is legitimately all you need to do to make these. That’s it. The entire process takes roughly 30 minutes and then you’ve got yourself enough edible cookie dough to last you a week (or an hour, depending on how hungry you’re feeling.)

Want to take this recipe a step further? Try rolling some of the dough into balls, dunking them in melted milk/dark chocolate, and then freezing them for a couple of hours or overnight. You’ll get yourself some chilled chocolate-covered cookie dough bites when the chocolate coating hardens!

EdibleCookieDough04

xx

Quick Eats: Lemon Bars

Comments 4 Standard

LemonBars01

My mom recently baby-sat my seven year old niece for a couple of days since her Summer vacation is officially underway but my brother and my sister-in-law’s work schedules haven’t changed quite just yet. My mom had a full itinerary for the whole two days- including arts & crafts, a Super Soaker watergun fight- and plenty of baking since my niece’s stomach is essentially a bottomless pit where no amount of food ever satisfies her hunger.

I digress. Apart from cookies, brownies, and pastries- the two made boxed lemon bars my mom had picked up on a recent shopping trip. Since I have a love of all things lemon in the Summertime- I had stopped by during my lunch break to pick up a couple to take back to my office with me- only to be told they had come out horrible and tasted like “battery acid” (my mom’s descriptions are really great, for the record.)

Sure enough, when I opened my mom’s refrigerator to take a look for myself- I was greeted by the most unappetizing and orange (I’m still not sure why or what happened there?) colored lemon bars I’d ever seen in my life. I thought for sure my niece, who would eat literally ANYTHING– would be excited about them- but even she was grossed out by their taste and texture.

Inspired by their kitchen disaster, I decided to seek out a lemon bar recipe on my own- and voila! I found this one through PureWow that seemed easy enough. I gave it a try- with my mom present- to show her how it’s done.

LemonBars02

WHAT YOU’LL NEED:

  • 16 ounces refrigerated sugar-cookie dough
  • 2¾ cups sugar
  • 1 cup (plus 2 tablespoons) all-purpose flour
  • 1 cup freshly squeezed lemon juice
  • 7 eggs
  • 1 tablespoon lemon zest
  • Confectioners’ sugar, as needed for finishing

OKAY, HERE’S WHAT YOU DO:

1. Preheat the oven to 375°F. Line a 13-by-9-inch pan with parchment paper. Lightly grease the parchment paper with nonstick spray.

2. Press the sugar-cookie dough into the base of the prepared pan in an even layer. Dock all over with a fork and transfer to the freezer to chill for 10 minutes.

LemonBars03

3. Bake the cookie crust until it’s lightly golden at the edges, 12 to 15 minutes. When you remove the pan from the oven, hit it firmly on the counter to help flatten the crust. Let cool while you make the filling.

4. Lower the oven temperature to 350°F. In a large bowl, whisk the sugar and flour to combine. Whisk in the lemon juice, eggs and lemon zest. Mix until well combined.

LemonBars04

5. Pour the filling into the cooled crust. Bake until the filling is set and lightly golden at the edges, 15 to 18 minutes. Cool completely.

6. Sprinkle confectioners’ sugar all over the surface. Cut the bars into 12 even squares, and then cut each square in half to make two triangles. Serve immediately or keep refrigerated in an airtight container until ready to serve.

LemonBars05

These bars were awesome. They were gooey, tangy- and actually yellow (the way they’re supposed to be!) I actually had some extra filling left over from this batch that I used to make a lemon custard that turned out just as delicious. I’m really looking forward to making more of these throughout the Summer. They’re a perfect and refreshing treat!

xx

Quick Eats: No-Bake Chocolate Peanut-Butter Pretzel Bars

Comments 3 Standard

ChocolatePretzelBars01

So, funny (but not really funny) story- but for years I had to be cautious about the types of pretzels I ate since generic, cheaper-brand ones would often make me break out in hives from head to toe shortly after being ingested. Be it because of whatever preservatives, sodium, or colorings were used in aforementioned brands- I’ll never know- but I learned to trust a couple of different companies over time that I could eat without needing to keep a bottle of calamine lotion and Benadryl nearby for afterwards.

I saw this recipe online recently and the photos of the finished product looked really, really good. I grabbed a couple of packages of pretzel sticks from one of my trusted snack brands and decided to try it out for myself. Whipping it up was easy enough- especially with no actual baking required- but it was the waiting to try/eat them that proved to be the most difficult part of the process!

ChocolatePretzelBars02

WHAT YOU’LL NEED:

  • 2½ cups pretzel crumbs (from about half a full-size bag)
  • 1½ cups confectioners’ sugar
  • 10 tablespoons (1¼ sticks) unsalted butter
  • 1¾ cups smooth peanut butter, divided
  • 1 teaspoon pure vanilla extract
  • One 12-ounce bag milk chocolate chips
  • ½ cup heavy cream
  • 1 cup lightly crumbled/grated pretzels

OKAY, HERE’S WHAT YOU DO:

1. Lightly grease a 9-inch square baking pan with nonstick spray and then line it with parchment paper, allowing 2 inches of extra parchment to hang over the sides.

2. In a large bowl, mix the pretzel crumbs with the confectioners’ sugar to combine. In a small bowl, whisk the melted butter with the 1½ cups peanut butter and the vanilla extract to combine.

ChocolatePretzelBars03

ChocolatePretzelBars04

3. Add the peanut butter mixture to the pretzel mixture and stir until the crumbs are evenly coated and moistened. Pour the crumb mixture into the prepared pan and press into an even layer.

4. Place the chocolate chips in a medium-size heat-safe bowl. In a small pot, bring the cream to a simmer over medium heat. When the cream is simmering, add it to the chocolate chips and let sit 15 seconds. Stir the mixture until smooth and well combined.

5. Pour the chocolate mixture over the pressed pretzel crumb layer and spread evenly. Sprinkle the crumbled/grated pretzels evenly over the chocolate.

ChocolatePretzelBars05

6. In a small bowl, stir the remaining ¼ cup peanut butter to loosen it. Microwave for 20 to 30 seconds, then drizzle the softened peanut butter over the crumbled pretzels.

7. Refrigerate until firm, 30 to 45 minutes.

8. Cut into 16 even squares. Store the bars in the refrigerator in an airtight container until ready to serve.

These squares were so, SO good! They were the perfect combination of chewy and crunchy- and sweet and salty. I’ve been indulging on these over the past couple of days and I’m looking forward to making a batch for the people in my office for the next weekend we all put in some overtime together.

And best of all? No hives!

ChocolatePretzelBars06

xx

Quick Eats: Red Velvet Lava Cakes

Comments 3 Standard

RedVelvetLavaCakes01

Remember at the end of February when I said I intended on sharing a recipe for what I considered to be the greatest dessert ever? Well, here it is- unless you don’t like red velvet cake, of course- in which case please get far, far away from me. I will side-eye you into the next century.

A look at any of my birthday celebrations over the past few years is all the documentation anyone would ever need to see I love anything red velvet (and I only recently ran out of a limited edition red velvet-scented body wash that Bath & Body Works created a couple of months ago for the holiday season.) The only thing I may love more than the cake itself is miniature indulgent versions of it- or any dessert, really. I’m all about small- but satisfying- portions of cakes/pastries/sugary snacks. Less goes to waste and I’m less inclined to overeat/put myself into a food coma when I have a tinier serving on my plate.

When I first laid eyes on the recipe for these little, round and personal red velvet lava cakes- I knew I had to give them a try. How could I not?!

RedVelvetLavaCakes02

WHAT YOU’LL NEED:

* 3 tablespoons all-purpose flour

* 1 tablespoon cocoa powder

* Pinch of salt

* 4 tablespoons unsalted butter

* 1½ ounces semisweet chocolate

* ½ cup confectioners’ sugar, plus more for finishing

* 1 egg

* 1 egg yolk

* ½ teaspoon pure vanilla extract

* 2 teaspoons red food coloring

OKAY, HERE’S WHAT YOU DO:

1. Preheat your oven to 425°F. Lightly grease two ramekins (or two cavities of a muffin pan) with nonstick spray.

2. In a small bowl, whisk the flour with the cocoa powder and pinch of salt to combine.

3. In a medium-sized, heat-safe bowl, melt the butter and chocolate in 15-second intervals in the microwave until melted and smooth.

RedVelvetLavaCakes03

4. Stir in the confectioners’ sugar into the butter and melted chocolate mixture until well combined. From there- add the egg, egg yolk, vanilla extract and food coloring- and stir until well combined.

5. Add your now red-tinted concoction to the whisked flour, cocoa powder and salt. Mix thoroughly until there are no lumps.

6. Divide the batter evenly between the prepared ramekins. Bake until set at the edges but still soft in the center, approximately 13 to 15 minutes. Let cool for 3 to 5 minutes inside the pan, then un-mold each cake onto a plate.

RedVelvetLavaCakes04

7. Serve warm- immediately- and garnish with confectioners’ sugar.

8. Don’t burn the roof of your mouth as you inhale your serving of molten deliciousness!

RedVelvetLavaCakes05

These little cakes came out so much better than I could have ever anticipated- and the inside was cooked to gooey, warm and sweet perfection. I served these prior to Sunday night’s sit-down for the latest ‘Walking Dead’ episode and they were a big hit!

I can imagine that if you substitute a few of the ingredients, you could probably make all sorts of flavor variations of these cakes with minimal effort or disaster. I’m tempted to try my hand at a dark chocolate or more fruity/lemon version the next time!

… But not after I make a few more red velvet ones, first.

xx

Quick Eats: Homemade Peppermint Patties

Comment 1 Standard

PeppermintPatties01

Since I’m not scheduled to start my new job for a couple more weeks, I’ve had plenty of time to get into a more festive state of mind in preparation for the upcoming holidays. My Christmas tree is going up this coming weekend (as well as an attempt at some exterior illumination ala Clark Griswold in ‘Christmas Vacation’,) I’ve been listening to classic holiday music in my car as I go from store to store to try and finish my shopping and gift wrapping within a reasonable amount of time- and I’ve been looking at seasonal recipes in-between signing Christmas cards and drafting my usual year-end best wishes e-mails to distant friends and former colleagues.

Over this past weekend, one recipe in particular caught my eye- homemade peppermint patties. Growing up, my dad ate the individually wrapped York brand of the candies all the time, and nearly every Christmas present I purchased for him up until his passing included an oversized bag of them with it, too.

And so I thought it’d be fun to try my hand at making my own this year, instead.

PeppermintPatties02

WHAT YOU’LL NEED:

* 3 cups confectioners’ sugar

* 3 tablespoons unsalted butter, at room temperature

* 3 tablespoons heavy cream

* 1¼ teaspoon peppermint extract

* ½ teaspoon vanilla extract

* 12 ounces dark chocolate candy melts or baking bars

OKAY, HERE’S WHAT YOU DO:

1. In the bowl of an electric mixer fitted with the paddle attachment, mix the confectioners’ sugar and butter to combine. Add the cream gradually, and mix until the mixture is uniform.

2. Add the peppermint and vanilla extracts, and continue mixing to combine.

PeppermintPatties03

PeppermintPatties04

3. Place the peppermint mixture on a piece of parchment paper and form it into a log about 2 inches in circumference.

4. Wrap the log in the parchment and transfer to the freezer. Freeze until well chilled (approximately 20 to 30 minutes.)

5. Using a sharp knife, cut the frozen log into ½-inch-thick wafers. If the mixture seems to have softened, return the wafers to the freezer.

PeppermintPatties05

PeppermintPatties06

6. Melt the chocolate in the microwave in 15-second intervals, mixing in between. Line a baking sheet with parchment paper. Working one at a time, dip each wafer into the melted chocolate with a fork. Tap away excess chocolate from the base, then transfer each dipped piece to the prepared baking sheet. Let set fully.

PeppermintPatties07

7. Once the chocolate has set, use a spoon to drizzle more melted chocolate over the peppermint patties in a decorative fashion. Let set fully before serving. Store in an airtight container for up to a week.

These things came out SO GOOD. Sure, they weren’t perfectly round like the York brand, and sure- I deliberately cut them a teeny, tiny bit thicker than instructed- but they tasted incredible.

And if eating a tray of these things wasn’t enough to ruin my diet for a week and a half- I also served the Patties up with a hot mug of Nutella cocoa, which is made by simply adding two tablespoons of Nutella to one cup of steamed milk and stirring until it’s evenly dissolved.

I plan on making another batch of these for when I have family over on Christmas Eve- and I’d like to think my dad would have enjoyed them, too!

PeppermintPatties08

Quick Eats: Oven-Baked S’mores Bars.

Comments 2 Standard

OvenBakedSmoresBars01

I know that August, while still scorching hot in certain parts of the world (including here)– also marks the wind-down of the Summer season. For some who don’t like stifling weather or the humidity, this is a relief- but for those of us in New England, most of who feel like we only just recently dug ourselves out of a never ending snow pile- the last days of Summer can feel like a punch to the stomach. I adore Autumn (my favorite season!) but I really wouldn’t mind if Summer decided to stick around for just a little while longer- maybe even lingering around in late September? Please? Pretty please?

Oh well- fret not! There’s still a little bit of time between now and Labor Day to enjoy and savor some final Summer fun- including baking one of my favorite seasonal treats- and you don’t need a campfire to do it!

If you don’t have access to a fire pit, or if it’s raining, or if you just can’t seem to make a proper s’more on a stick (I’m notoriously bad at it,) you can bake your own less-messy version right in your oven in just over a half hour!

OvenBakedSmoresBars02

OvenBakedSmoresBars03

WHAT YOU’LL NEED:

* 18 graham crackers

* 1/4 cup of granulated sugar

* A pinch of salt

* 8 tablespoons of melted unsalted butter

* 3-4 extra-large Hershey’s bars (or 7/8 regular-sized ones)

* 1 bag of marshmallows (you don’t have to use all of them, but if you want them extra gooey- go nuts.)

OKAY, HERE’S WHAT YOU DO:

1. Preheat your oven to 400°F. Lightly grease a 9 x 13″ baking pan with nonstick spray and line with parchment paper, allowing an extra 2-3 inches of parchment to hang over the edges of the pan.

2. Using a bowl or a food processor, pulse/beat the graham crackers until they are finely ground. Pour the crumbs into a medium bowl.

OvenBakedSmoresBars04

OvenBakedSmoresBars05

3. Add the sugar and salt to the graham cracker crumbs and stir to combine. Add the melted butter and stir until the crumbs are evenly moistened. Pour your crumb mixture into the prepared baking pan and press it into an even layer.

4. Bake the crust for 8-10 minutes, or until the edges are lightly golden. From there, let the crust cool for 5-10 minutes.

5. Arrange the chocolate bars evenly on top of the slightly cooled crust, leaving about ¼ inch of crust uncovered around the edges. Arrange the marshmallows on top of the chocolate, leaving some space between each one (they will expand a little).

OvenBakedSmoresBars06

6. Bake until the chocolate is soft and beginning to melt, and the marshmallows are evenly toasted on top, 10-12 minutes (a little less if you don’t want the graham cracker crust too crispy.)

7. You can slice and serve the bars immediately, or let them cool for 15-20 minutes if you’d like to slice them cleanly.

8. Enjoy! (Side note: you can reheat sliced bars in the microwave for 20 to 30 seconds!)

OvenBakedSmoresBars07

OvenBakedSmoresBars08

These came out so, so good (although s’mores are one of those rare desserts that are near-impossible to screw up,) and I will definitely be making them again before September creeps up on me. My niece would love these for sure- so I’m going to enlist her help in making them with me next time!

xx

Quick Eats: Clementine Cake

Comments 5 Standard

ClementineCake01

WalterMittyClementineCake

One of the best movies I’ve seen in recent years has to be Ben Stiller’s “The Secret Life of Walter Mitty.” The story. The visuals. The soundtrack. The entire film is beautiful from start to finish and is one of the only movies I can recall leaving the theater after seeing and not only being moved to tears by how perfect it was- but feeling immensely satisfied- like every dime that had been spent on my ticket was worth it.

I’ve since watched the movie a handful of times On-Demand, each viewing just as enjoyable as the last- and the most recent being just the other night. One of the minor, but re-occurring plot devices in the film is the clementine cake Walter’s Mom (played by Shirley MacLaine,) bakes. No spoilers here- because I highly recommend anyone who hasn’t seen the movie yet watches it as soon as humanly possible- but I felt inspired to try my hand at baking my own!

ClementineCake02

ClementineCake03

YOU WILL NEED:

* Food processor

* 8-9 inch springform pan

* Parchment paper

* 6 eggs

* 5-6 clementines

* 1 1/4 cup of white granulated sugar

* 2 1/4 cup of ground almonds

* 1 teaspoon of baking powder

OKAY, HERE’S WHAT YOU DO:

1. Pre-heat your oven to 375°F.

2. While the oven heats up, butter the springform pan and line with cut and fitted parchment paper.

3. Poke washed clementines 5-6 times with a knife or fork before placing in a covered, microwave-safe dish/bowl and heating for 3-4 minutes or until the clementines are soft and mushy.

4. After letting the clementines cool for a few minutes, place them- peel and all- into the food processor and grind until they reach a smooth, puréed texture.

ClementineCake05

ClementineCake04

5. Beat the 6 eggs and 1 1/4 cups of sugar in a large mixing bowl until the mixture is light in color and thick in consistency.

6. Add the puréed clementines, the 2 1/4 cup of ground almonds, and the teaspoon of baking powder to the eggs and sugar and continue thoroughly mixing.

7. Pour the mixture into the springform pan and bake in the oven for approximately 45 minutes. It may need to stay in for a little longer to ensure the middle is cooked through and evenly. If this happens, be sure to cover the top of the cake with a thin layer of tin foil to prevent the surface and edges from getting burnt.

ClementineCake06

8. After removing the cake from the oven, let it cool. Once it’s cold- and therefore won’t crumble into pieces on contact- remove the pan and parchment paper. Glaze and decorate.

ClementineCake07

ClementineCake08

To create the glaze, I just mixed some powdered sugar, a little butter, and a cup of freshly squeezed clementine juice- and topped the cake with some candied sliced clementines (simmered sugar and water!) The total cooking time, sans-cooling the cake pre-decorating- was about an hour to an hour and fifteen minutes- and the cake can serve up to 8 or 10 people!

And of course, the last step to this recipe is to stuff your face, (and be sure to bring a few slices along when you set off on an adventure into the unknown- just like Walter Mitty!) The cake is decadent, tangy, and goes really well with a nice cup of coffee or tea!

ClementineCake09

ClementineCake10

And to close out this fun foodie post, here is my favorite quote from the movie- taken from a screen-grab as Walter examines a gift left for him in the beginning of the film. The saying, the “Life Magazine” motto, is lovely- and has become my mantra for 2015 because of how powerful it is.

WalterMittyWallet

xx

“The Walking Ginger-Dead”

Comments 4 Standard

TheWalkingGingerdead1

TheWalkingGingerdead2

“The Walking Dead” mid-season finale aired a little more than a week ago, thus beginning the show’s brief hiatus until it’s return in February- and I’m already going through withdrawals. My Sunday nights feel empty and meaningless now, and I find myself curling up in the fetal position- and weeping- when I’m not checking off the days on the calendar until the show comes back (not really, but you know what I mean. I can’t wait for the second half of the season!)

Luckily, I have the upcoming holidays to distract me during the first few weeks of Michonne deprivation. I also have this “Walking Ginger-Dead” cookie kit I picked up in Western Massachusetts a couple of weeks ago to give me my walker fix with a semi-festive (and more delicious) twist. I haven’t made actual Christmas cookies in a couple of years, and it’s been even longer than that since I’ve baked and decorated gingerbread men- so I was excited to give this box full of slightly-morbid fun a try. I even included one of my numerous Daryl Dixon FUNKO figurines to help out while I snapped some photos of the process and finished cookies.

TheWalkingGingerdead3

The kit comes with everything: the gingerbread mix, four “walker” molds, white frosting mix, red and black icing, and a bag of multi-colored candy balls for decorating. I only had to scrounge up a minimal amount of supplies on my own (water, butter and honey.)

From there, it was just a matter of mixing the gingerbread, letting it settle and harden in the fridge for twenty minutes, and rolling it flat to make the molds. My Daryl figurine was there to keep a watchful eye on things.

TheWalkingGingerdead4

TheWalkingGingerdead5

TheWalkingGingerdead6

After the shapes were cut from the dough and stuck on a baking sheet, I only had to heat them up in the oven for about 10-15 minutes to get them warm and solid enough for decorating. As always- Daryl stayed vigilant.

TheWalkingGingerdead7

Now, I’m no artist, and the decorating process was messy, to say the least- but I personally think the cookies came out rather (and unexpectedly) cute once the icing had dried. It’s hard to make gingerbread men look gory and scary- but I did my best!

TheWalkingGingerdead8

TheWalkingGingerdead9

TheWalkingGingerdead10

The box made a total of ten cookies, and the entire process- mixing, baking, AND decorating- took just under an hour to complete. It was a lot of fun. Maybe not the most Christmas-y confection I could have whipped up, but fun nonetheless! Best of all? The cookies are delicious- although it felt a little weird biting into them when it’s usually the walkers biting into people.

If you’re in the mood to bake some unconventional gingerbread men of your own, or if you’re just as big a “Walking Dead” fan as I am and need something tasty to get you through the hiatus- you can purchase your own “The Walking Ginger-Dead” kit at Amazon for $11.25 by CLICKING HERE!

Thanks for the help, Daryl!

TheWalkingGingerdead11

Cupcakes and Comedy

Leave a comment Standard

CupcakesAndComedy1

CupcakesAndComedy2

CupcakesAndComedy3

CupcakesAndComedy4

CupcakesAndComedy5

Yesterday I headed out to NYC to spend an afternoon gallivanting around the city with my friend Alison before we headed to a comedy show on Broadway in the evening. One of our stops, at my insistence, was Sprinkles Cupcakes on Lexington and 60th- and, specifically- their cupcake ATM, which is exactly what it sounds like. You simply select one or more of the available flavors (which change daily,) of cupcake you want, slide your debit/credit card, and in less than sixty seconds and at $4.25 per cupcake- you have a rich, decadent dessert in a convenient little box in your hands. This is the future, everyone.

Alison indulged in a s’mores cupcake, and I carefully selected a chocolate-peanut-butter one- and while it was a little messy- it might also have been one of the best cupcakes I’ve ever eaten. It was delicious (and filling!) and it took a lot of willpower not to hurry back and try some of the other flavors. I’ll definitely be making another stop at the ATM the next time I’m in New York- and I highly recommend it for any dessert aficionado in the area, or visiting, who is looking for a quick, convenient, and most importantly- tasty– sugar fix.

CupcakesAndComedy6

CupcakesAndComedy7

The comedy show Alison and I went to was headlined by Nerdist’s Chris Hardwick at Carolines on Broadway. We had seen Chris perform there a little more than a year ago, and he had been fantastic. Last night, he did it again. Chris slayed with his new material and was kind enough to pose for a silly photo between his sets in Carolines’ “Avatar” style lighting that turned everyone and everything in the vicinity a bright shade of blue.

I’m sure I’ve said it before, but I will say it again without hesitation- Chris is one of the nicest and hardest working guys around, and if you haven’t checked out any of his MULTIPLE endeavors with Nerdist or his television shows (@Midnight is entirely too fun to watch,) then you’re really missing out.

Overall, it was a wonderful day, made even more so because I got to catch up with Alison for the first time in months. I’ll be back in the city within the next couple of weeks for some other day-trips/weekend stuff I’ve been planning since the Winter- and to get another cupcake from Sprinkles, of course!